Download TP-Link Tether App for Mac - Step-by-Step Setup Guide
Managing your home or office network is an essential task to ensure a smooth internet experience. TP-Link, a well-known brand in the networking industry, offers a range of routers, range extenders, and mesh systems to help you optimize and manage your Wi-Fi network. The TP-Link Tether app is a powerful tool for managing these devices, providing an easy-to-use interface on mobile devices like iPhone and Android. However, did you know that you can also use the TP-Link Tether app on your Mac?
In this article, we will provide a comprehensive guide on how to download the TP-Link Tether app on your Mac, step by step. Whether you need to manage your TP-Link router, set up parental controls, or secure your network, this guide will help you download, install, and get the most out of the TP-Link Tether app on your Mac.
What is the TP-Link Tether App?
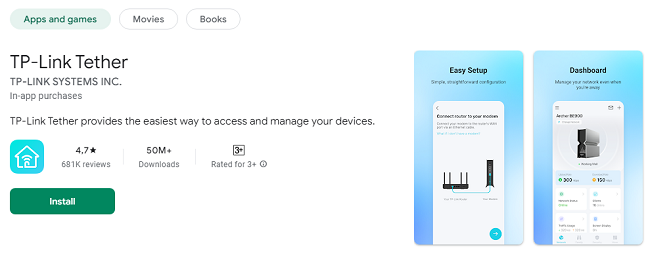
The TP-Link Tether app is a free tool developed by TP-Link that lets users manage and configure TP-Link devices like routers, range extenders, and Deco mesh systems. While the app is primarily designed for mobile devices (iOS and Android), it can also be used on a Mac computer to help you optimize your network.
Some of the key features of the TP-Link Tether app include:
Easy Device Setup: You can quickly set up TP-Link devices like routers and range extenders from your Mac.
Wi-Fi Management: Manage your Wi-Fi network settings, including SSID, password, and security settings.
Parental Controls: Set up content filters and time limits for specific devices.
Network Monitoring: Monitor connected devices, their data usage, and block unauthorized users.
Guest Network Setup: Create a separate network for guests to access the internet without compromising your primary network's security.
By using the TP-Link Tether app, you can easily configure, manage, and monitor your TP-Link network devices from your Mac, offering you more flexibility in managing your home or office network.
Why Download the TP-Link Tether App on Your Mac?
There are several reasons why you might want to download the TP-Link Tether app on your Mac:
Convenience: If you prefer managing your network from a computer rather than a mobile device, the TP-Link Tether app on your Mac gives you the ability to access all features in a larger and more detailed format.
Easy Setup and Configuration: Setting up a new TP-Link router, mesh system, or range extender is simplified with the app’s intuitive interface.
Full Control of Your Network: The TP-Link Tether app lets you make real-time changes to your Wi-Fi network, block unauthorized devices, and check network performance from your Mac.
Parental Control Management: If you use parental controls to restrict your children’s internet access, the TP-Link Tether app allows you to adjust these controls from your Mac.
Better Monitoring: Managing a home or office network often involves monitoring multiple devices. The TP-Link Tether app allows you to do this easily on your Mac without having to switch between devices.
Download TP-Link Tether App on Your Mac Device
While the TP-Link Tether app is available for iOS and Android, it does not have a native macOS application. However, there is a solution to use the TP-Link Tether app on your Mac through the use of an Android emulator. Android emulators allow you to run Android apps on your Mac, which means you can download the TP-Link Tether app and use it on your computer with ease. Here’s how you can do it:
Step 1: Download and Install an Android Emulator
To download the TP-Link Tether app on your Mac, you’ll need an Android emulator. The most popular Android emulators for macOS are:
BlueStacks
Nox Player
MEmu
For this guide, we’ll use BlueStacks, as it is one of the most reliable and easy-to-use emulators available.
Go to the official BlueStacks website.
Click on the Download BlueStacks button.
Once the download is complete, open the downloaded file and follow the installation prompts to install BlueStacks on your Mac.
Step 2: Set Up BlueStacks on Your Mac
After the installation is complete, you’ll need to set up BlueStacks on your Mac:
Open the BlueStacks emulator by double-clicking on its icon in your Applications folder.
When BlueStacks launches for the first time, it may ask you to sign in with a Google account. This is necessary to access the Google Play Store and download apps.
Sign in with your Google account (or create a new one if you don’t have one).
Once signed in, you’ll have access to the Google Play Store within BlueStacks.
Step 3: Download the TP-Link Tether App from Google Play Store
Now that you have BlueStacks set up, you can download the TP-Link Tether app:
In BlueStacks, open the Google Play Store.
Use the search bar at the top and type TP-Link Tether.
Select the TP-Link Tether app from the search results.
Click the Install button to download and install the app within BlueStacks.
The app will automatically be installed within the BlueStacks emulator. Once the installation is complete, you can open the TP-Link Tether app from the BlueStacks home screen.
Step 4: Sign In and Set Up Your TP-Link Devices
Once the app is installed, you’ll need to sign in to your TP-Link account to access your devices:
Open the TP-Link Tether app within BlueStacks.
If you already have a TP-Link account, log in with your credentials.
If you don’t have an account, click on Sign Up and follow the steps to create a TP-Link ID.
After logging in, you can add and manage your TP-Link devices by following the on-screen instructions. The app will guide you through setting up your router or other TP-Link devices.
Step 5: Start Using the TP-Link Tether App
Once your devices are added, you can start using the TP-Link Tether app to manage your network from your Mac. You can:
Change Wi-Fi settings (SSID, password, security settings)
Set up parental controls
View connected devices and block unauthorized users
Check network performance and troubleshoot issues
Set up guest networks for visitors
Tips for Using the TP-Link Tether App on Your Mac
Now that you’ve downloaded and installed the TP-Link Tether app on your Mac, here are some tips to help you use the app effectively:
Enable Notifications: Set up notifications to get alerts when new devices connect to your network or when there are issues with your TP-Link devices.
Regularly Update Firmware: Keep your TP-Link devices up to date with the latest firmware. The TP-Link Tether app will notify you when updates are available.
Optimize Your Wi-Fi Network: Use the app’s built-in tools to monitor and optimize your Wi-Fi performance. You can find out which devices are using the most bandwidth and ensure your network is running smoothly.
Use Parental Controls Effectively: Set up time-based restrictions for devices, and block access to websites or content that isn’t appropriate for your children.
Troubleshooting Common Issues
While the process of downloading and using the TP-Link Tether app on your Mac is usually smooth, you may encounter some issues. Here are some common problems and solutions:
1. The App Won’t Open in BlueStacks
If the TP-Link Tether app won’t open in BlueStacks, try the following:
Ensure that BlueStacks is updated to the latest version.
Restart BlueStacks and try opening the app again.
If the app continues to crash, try reinstalling it within BlueStacks.
2. The App Is Not Downloading
If the app won’t download from the Google Play Store within BlueStacks:
Check your internet connection to ensure it’s stable.
Try logging out and back into your Google account in BlueStacks.
Clear the cache of the Google Play Store within BlueStacks by going to Settings > Apps > Google Play Store > Clear Cache.
3. Device Not Connecting
If you’re having trouble adding or connecting a TP-Link device, make sure:
Your device is properly powered on and in pairing mode.
Your Mac is connected to the same Wi-Fi network as your TP-Link device.
You’ve entered the correct credentials when prompted.
Conclusion
Downloading and using the TP-Link Tether app on your Mac may require the use of an Android emulator like BlueStacks, but it provides a convenient way to manage your TP-Link network from the comfort of your computer. By following the steps outlined in this guide, you can easily download, install, and start using the TP-Link Tether app on your Mac.
With its powerful features, including Wi-Fi management, device monitoring, parental controls, and network optimization, the TP-Link Tether app offers an intuitive and efficient way to keep your network secure and running smoothly. Whether you’re at home or on the go, using the TP-Link Tether app on your Mac ensures you have full control over your network at all times.
Start managing your TP-Link devices today by following these simple steps, and enjoy a seamless and optimized network experience on your Mac.
Updates